
Integrating Salesforce IDP with Adobe Learning Manager for Seamless Single Sign-On
Follow the below steps to configure the SSO application for ALM in salesforce.
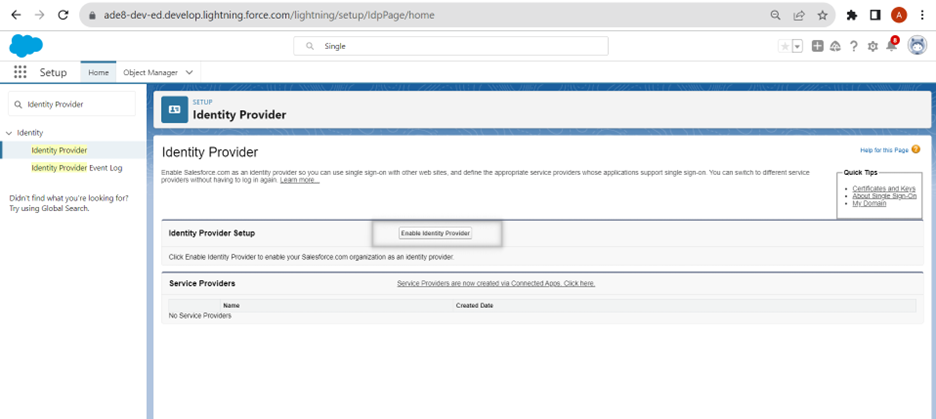
- Login to your salesforce admin account and navigate to “Setup” and search for “Identity Provider”. Once the page has been loaded kindly click on the “ Enable Identity Provider” option to enable IDP functionality in salesforce.
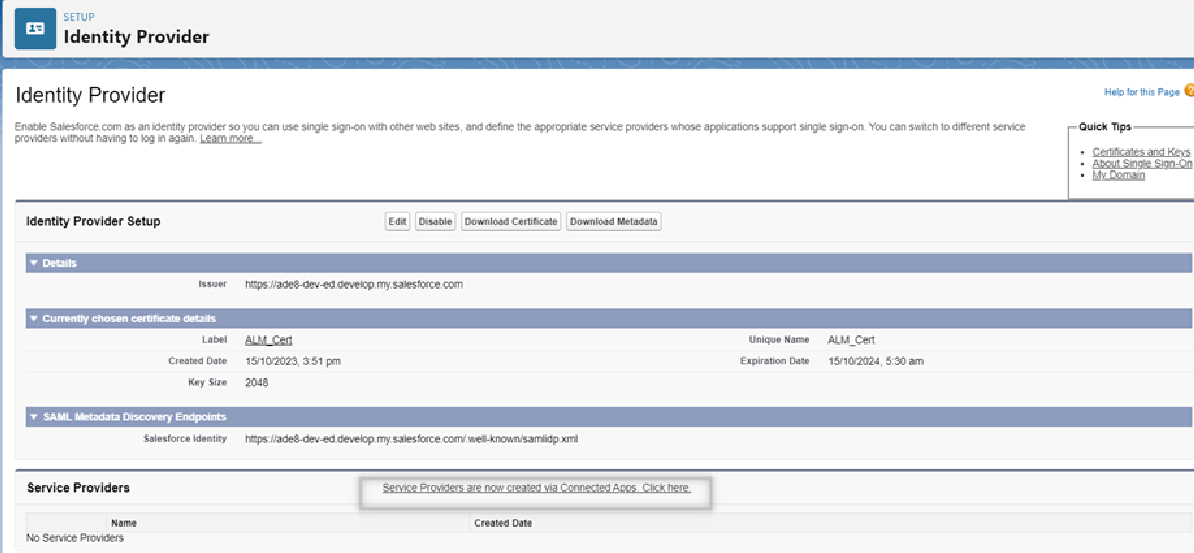
- After clicking on enable you can select a ready to use certificate or create your own certificate. After creating the certificate click on the option “Service Providers are now created via Connected Apps. Click here.”
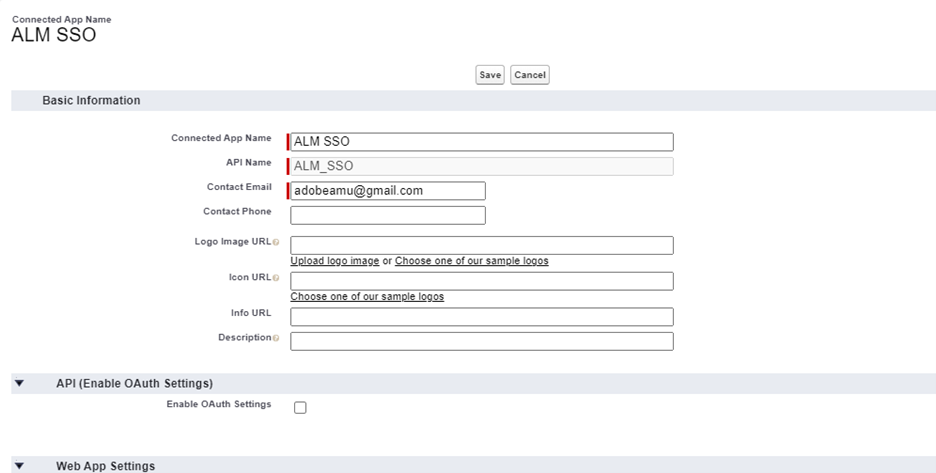
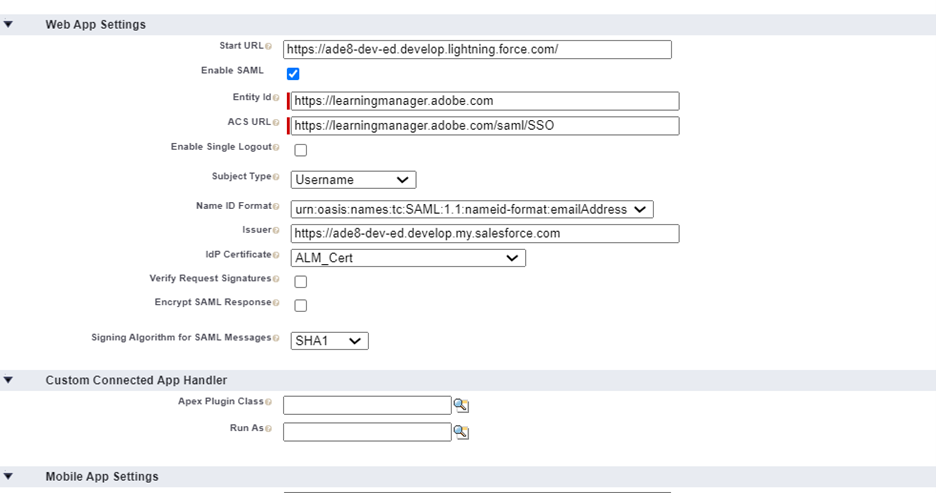
- This option will provide you the configuration page to set up the ALM parameters, kindly use a Connected App Name, API Name, Contact Email and scroll down to the “Web App Settings” section and use the settings as shown below –
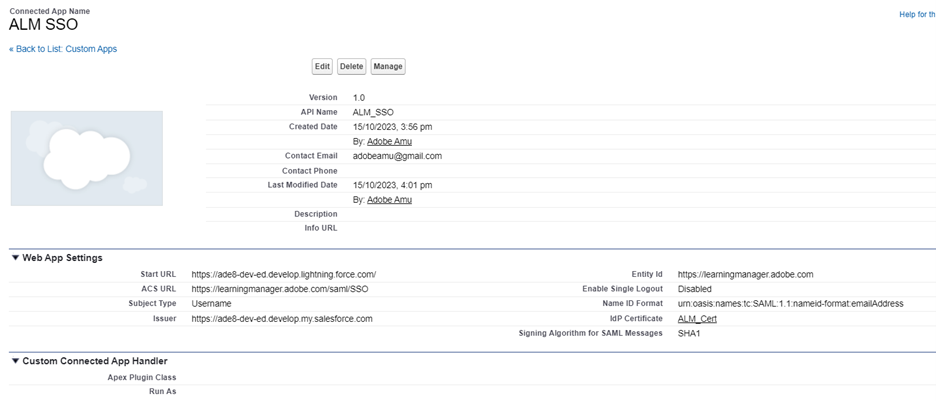
- After completing the above configuration click on save to finish the app set up in salesforce, you will land in a page exactly as shown below.
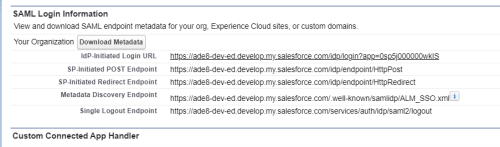
- Click “Manage” shown in the same page in the top and scroll down to the “SAML login Information” section, and download the Metadata file and copy the IDP_Initiated login URL to be used in the ALM side configuration.
- Make sure to assign this app to the relevant users in the salesforce and their email addresses should exactly match with the email addresses registered in ALM.
By diligently following these thorough steps, you’ve effectively merged Salesforce as an Identity Provider (IDP) with Adobe Learning Manager, enabling seamless Single Sign-On and centralized control over user access. This integration not only improves the user experience but also streamlines the management of your learning management systems.
Tags: #How to set up Salesforce lightning IDP with Adobe Learning Manager (ALM), #Set up Salesforce with ALM for SSO