
Using AI to Create an Interactive Scenario with the All-New-Adobe Captivate: Part Four
Now that we’ve looked at a lot of the AI technologies that can come into play when creating elearning courses, let’s dig in to what we can use the All-New Adobe Captivate for today. Building out an elearning course shouldn’t be difficult, and one of the major advantages of using Adobe Captivate is that it can be incredibly simple to assemble your content. Let’s look at the fundamental concepts that you need to understand to use the All-New Adobe Captivate.
In a nutshell, these are Pages, Blocks, and components. While there are other details to master, these three are the foundation of everything else that you do. Let’s have a look The most important parts of the content creation cycle are the pages that you will create – these can be setup in traditional (desktop-like) formats, but also can be long scrolling pages.
Now a block is any group or set of components that are dropped into a slide (or page) as a group. Let me show you what I mean, the image below is called a title block, and it has several components built in – but that doesn’t mean that you will see all of them each time you use the block.
You’ll see in the following image that the block includes components for an image, a caption, a subtitle, a card, and a button. By default, only the image and caption have been enabled. The other elements – the subtitle, the ‘card’ and the button are disabled at first. If you toggle one of these on or off, you can see what each one controls.

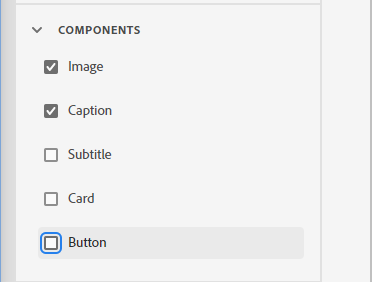
Here’s an enlarged view of that components menu. Just click on the scratch area (anywhere outside the slide layout OR click the slide thumbnail) to select the entire page (slide) and you’ll see the components menu appear. This will let you enable or disable any component on this page of the project. Notice that the image and Caption are enabled – and you can see that those are the elements that are appearing for you now. You could also enable a subtitle, and or add a card component (which is kind of like an organizer) and finally, you can add one – three buttons.
Here’s a video that I created that explains the concept of Slides, Blocks and Components in more detail.
The project that you see in this video is included in Captivate. Just create a new project, and then select the dark green – Product onboarding video to use the practice project that I’m using in the video demo above.

Once you have had a chance to familiarize yourself with the concepts of slides, blocks and components – everything in the All-New Adobe Captivate becomes pretty easy. Because it all works the same way. Even things like simulations use the same paradigm – so it’s much easier now to find things like your notes and interactions on simulation capture screens – just check the components area to see what’s on the page, or to add to it.
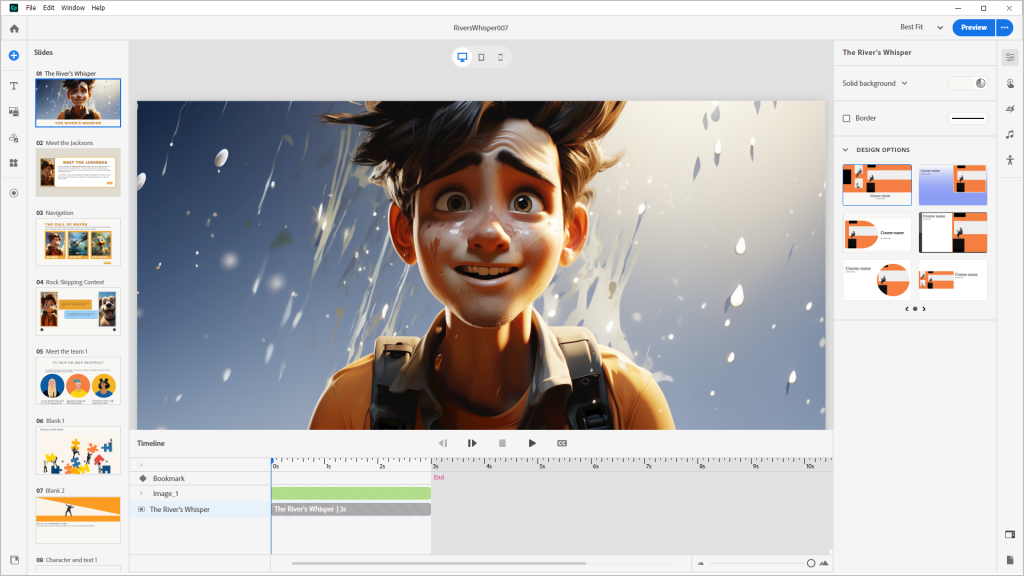
As we begin the River’s Whisper project, let’s start by introducing the whole family – Here’s the idea that I’m working with. I’d like to establish each member of the family as a character – so that when someone is in danger it triggers real emotion. Our goal is to get kids to stop playing recklessly near moving bodies of water, to get families to be more aware and alert when dangerous environmental hazards exist like this, and to encourage save reactions to unexpected events in these environments.
From a learnine perspective we want to transfer knowledge about safety around large bodies of moving water – but if we do it based solely on facts and statistics, the knowledge transfer will be blocked by feelings of anxiety and panic in the moment when these bits of information are most valuable. So how can we anticipate the conditions when such information is useful, and evoke those feelings without putting our learners in actual danger?
In general we want to simulate, or evoke a similar emotional state through the use of narrative. So, obviously, we’ll put the kid in danger. But if the kid cannot be harmed – for example he’s a stick figure, it’s harder for us to have feelings of empathy for his vulnerability – or to feel afraid for his safety.
The AI chat did a fairly good job of ideating around these notions – but you may have noticed that I asked questions like, how are people most often injured or killed in this circumstance. By identifying the most common actual negative outcomes, we can make better choices about how to represent the peril – and be assured that it will increase the likelihood that the learning experience will be closer to actual ‘need’ events that will come up for the learner. Ideally, they won’t need to know any of this, but the whole point of reducing incidents, is to prep everyone for something few may need, in the hope of saving lives.
So, how should we introduce the family. The new Captivate gives us quite a few options.
- Create a new blank slide and just start adding components (text or media)
- Create a styled slide – eg. an image collection to show various images and information about family
- Build something fairly traditional – one slide per family member and step through
- Add an interactive widget customized to meet family members
- Use multi-state objects and the timeline to automate a family gallery
A lot of this gets down to questions of efficiency vs. creativity. For Simplicity sake, let’s use the Carousel widget. I think it will have all the stuff we need and we won’t have to do any programming.
First I create a new blank slide. Just hit the blue plus symbol top left menu, and select blank. Then I select ‘Add new Widget’ from the same vertical menu on the left – it’s the fourth button down. It floats out a bunch of different widget choices, and I select the ‘Carousel’ type widget. This is fully functional interative carousel, meant to display text and images across multiple pages or topics. You can see how that makes sense for us to introduce each member of the family.

Each slide or component that you add has placeholder images and text. Notice that just like all the blocks that we introduced previously, there are components for this widget. But the widget is pretty big – and kind of ‘layered’. So it has a lot of components, and it has these extra little buttons that tell you that there are currently 3 pages in the carouself widget. (You might also notice that you can add pages with the slider at the top.)
To edit anything, we can just select it and replace – so it’s easy enough to drop in pictures of our family stars, and add titles / descriptions.

First, I set the total number of carousel slides to 5. I knew from the storyboard that I had one overview and four family members. While you can add carousel slides later – and take them away. You don’t get control over how slides are sorted in the carousel, so you should have a plan for your carousel slides before you begin.
I then disabled the previous slide component, and changed the design option for the button to shift from the arrow button to a more conventional button. I adjusted the colors to meet my own project requirements. The widget takes care of all the navigation – so the rest was just changing to the right page, and putting in the text and images.
Another benefit of using the All-New Adobe Captivate is that Captivate will handle all of the design problems for display on other devices. You don’t need to do much other than occasionally adjust the text font size for the tablet or mobile view. You’ll note here that I didn’t change anything – I’m just accepting the default settings for tablet and mobile views.

Next time I’ll talk more about developing the project. We’ll look at other elements, like interactive quiz questions and other methods that can be used to teach and reinforce the key concepts of the lesson.
All the little things you might want to know:
1. Here’s a link to an article about the two new versions of Adobe Captivate and how they differ.
https://elearning.adobe.com/2023/07/two-new-adobe-captivates-what-does-that-mean/
2. Here’s a link to download the All-New Adobe Captivate (it’s a trial but it will activate if you login and you already have a subscription to Captivate.)
https://www.adobe.com/products/captivate/download-trial/try.html?sdid=CMBLG
(Sign in with ‘Personal Account’ instance of your Adobe ID if you receive “Account Type not supported” error)