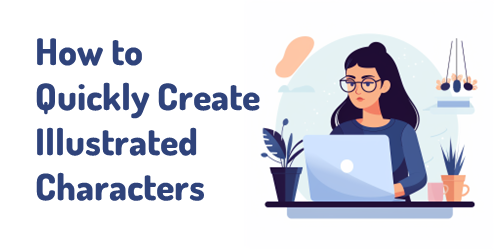
How to Quickly Create Illustrated Characters with AI
I see the promise of AI generated assets for e-learning. I’m not an illustrator. I have limited Photoshop skills. Because of this, my options for custom illustrations are slim. However, with AI I can find a balance of creating viable illustrated characters with minimal skills.
In previous posts we looked at:
Today, I’ll show some of the basic steps I use to create the illustrated characters I’ve shared in LinkedIn recently. In these three tutorials, I’ll give a quick overview on how to create simple, viable illustrated characters using AI. I am working with a few objectives: quick, simple, and minimal editing. I am willing to live with some imperfections.
Getting Started with AI Tip
I am using Midjourney to create my AI illustrations. You can use whatever you want. The process is very similar regardless of application. I will add that not all tools are offer the same quality. For example, here are two images using the same text prompt. The good example on the right comes from Midjourney. The other from one of the many of the tools that are out there trying to make money quickly from the AI goldrush. Buyer beware!
Step 1: How to Create a Character
I only cover the basics in the tutorials below and show some differences when you change the settings, but the secret with AI prompting is knowing how to adjust parameters such as style, seeding, and quality. The more you use those parameters the better control you have over your results. I will add that I find using fewer words is better.
There are a lot of videos on YouTube and elsewhere on getting consistent characters. I’m not going to get into the weeds on this. Here is a useful source for Midjourney users: John Walter: he has a good series on creating a consistent character.
- Set up your prompt. I use character, action, style, and white background (so I can clean the image up after I download it).
- Make parameter selections for style, etc.
- Once you have a character style you like, change the character descriptions. This is where you can mitigate the bias that is built-into the AI model.
The video below walks through some of these tips, and we look at options in terms of unique styles and characters.
Click here to view the video tutorial on YouTube.
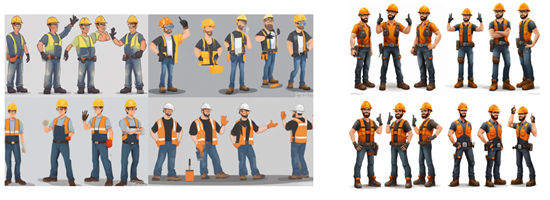
Step 2: Create a Quick Character Set from a Single Panel
This is easy and will give you five characters that are similar.
- Generate a character.
- Select a character to upscale.
- Do another version (minimal variance) which will provide four more similar characters.
- Download the characters and clean them up.
Click here to view the video tutorial on YouTube.
Step 3: Create a Character with Multiple Poses
A prompt with multiple poses will give you the same character but slightly different. You can play around with the number of poses, but three poses are a sweet spot. At a minimum you get three similar characters. Assuming the iterative characters are similar enough, you end up with fifteen similar characters.
- Generate a character and include the number of poses.
- Select a character panel to upscale.
- Do another version (minimal variance) which will provide four more similar characters.
- Download the characters and clean them up.
Click here to view the video tutorial on YouTube.
Step 4: Don’t Expect Perfection
This approach isn’t a perfect way to create characters. It’s a quick way to create good enough characters. My goal is to create viable characters quickly. So, I am willing to live with some imperfections.
- The hands and faces are problematic. That’s OK. With multiple characters you’ll get enough parts you can mix and match to get some good characters.
- You don’t need to use every character you get.
- Once you edit the characters, you will fix some of the issues that AI instigates. I’ll cover that in the next post.
Hopefully, these tips help and be sure to download the free characters in the community.